In this post, we are going to know about Server Side Datatable using Laravel 5.8. Data Table is one of the most important plugins in jQuery Library to show data in tables with the advance search function.
Datatables is very important for showing large data into the table. the main advantage of the data table is it gives to users the advanced search function to filter data and It also provides a lot of user-friendly functionalities like sort, pagination, and searches, and others functions to handle the database data in our web pages.
We will use using yajra/laravel-datatables-oracle package in this blog post this package help us to load web page faster than normal HTML table.
Step 1: Install Laravel
First, we need to install Laravel application to install the latest application use the flowing command.
laravel new dataTablesStep 2: Install Composer Package
In this step, we will install laravel yajra/laravel-datatables-oracle package for use to generate Server Side Datatable. So we need to just run following command to this install package.
composer require yajra/laravel-datatables-oracle:"~9.0"Step 3: Register provider
Register provider and facade on your config/app.php file.
'providers' => [
    ...,
    Yajra\DataTables\DataTablesServiceProvider::class,
]

'aliases' => [
    ...,
    'DataTables' => Yajra\DataTables\Facades\DataTables::class,
]
Step 4: Create a New Model, Controller, and Migration
Here, we want to create a new modal, controller and migration for Products table so first fire bellow command.
php artisan make:model Product -mcAbove command, will create Model, Controller, and Migration for Product. In the migration table file, we need to add some number of columns details for product table like name, description, and price etc.
<?php

use Illuminate\Support\Facades\Schema;
use Illuminate\Database\Schema\Blueprint;
use Illuminate\Database\Migrations\Migration;

class CreateProductsTable extends Migration
{
    /**
     * Run the migrations.
     *
     * @return void
     */
    public function up()
    {
        Schema::create('products', function (Blueprint $table) {
            $table->increments('id');
            $table->string('name');
            $table->text('description');
            $table->float('price');
            $table->timestamps();
        });
    }

    /**
     * Reverse the migrations.
     *
     * @return void
     */
    public function down()
    {
        Schema::dropIfExists('products');
    }
}
After That don’t forget to connect with a database in .env and restart the server than that run the flowing command to migrate the table product table.
php artisan migrateStep 5: Update Product Modal
Then we need to update the Product model file in our application like fillable, primary key, product, etc.
<?php

namespace App;

use Illuminate\Database\Eloquent\Model;

class Product extends Model
{
    protected $fillable = [
        'name', 'description', 'price',
    ];
}
Step 6 Add Some Routes
Add the first route to show data table and the second route to fetch data from the data table. here we use get method for both routes
Route::get('products-datatable', 'ProductController@datatable')->name('product.datatable');
Route::get('products-data', 'ProductController@productsList')->name('product.data');
Step 6: Update Controller with Some Methods
Here we use two methods one for view page and another one fetch data from the database.
<?php

namespace App\Http\Controllers;

use Illuminate\Http\Request;
use App\Product;
use DataTables;
class ProductController extends Controller
{
    public function datatable(){
        return view('products.datatable');
    }

    public function productsList(){
        return DataTables::of(Product::query())->make(true);

    }
}
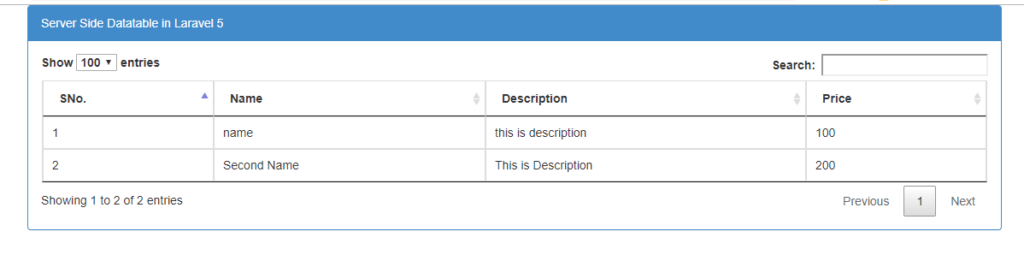
Step 7: Add a Blade File
At the final step, we make a one blade file in the products folder. we use some JS library CDN link and some simple javascript code.
<!DOCTYPE html>
<html lang="en">
<head>
  <meta charset=UTF-8>
  <meta name=viewport content="width=device-width, initial-scale=1.0">
  <meta http-equiv="X-UA-Compatible" content="ie=edge">
  <link href="//netdna.bootstrapcdn.com/bootstrap/3.2.0/css/bootstrap.min.css" rel="stylesheet">
  <link rel="stylesheet" href="//cdn.datatables.net/1.10.16/css/jquery.dataTables.min.css">

  <script src=//code.jquery.com/jquery.js></script>
  <script src=//cdn.datatables.net/1.10.16/js/jquery.dataTables.min.js></script>
  <title>Document</title>
</head>
<body>


<div >

  <div >

   <div >Server Side Datatable in Laravel 5</div>

   <div >

     <table id="product-table">
      <thead>
        <tr>
          <th>SNo.</th>
          <th>Name</th>
          <th>Description</th>
          <th>Price</th>
        </tr>
      </thead>
     </table>

   </div>

  </div>

</div>


<script>


$(function() {
  $('#product-table').DataTable({
    processing: true,
    serverSide: true,
    ajax: '{!! route('product.data') !!}',
    columns: [
      { data: 'id', name: 'id' },
      { data: 'name', name: 'name' },
      { data: 'description', name: 'description' },
      { data: 'price', name: 'price' }
    ]
  });
});
</script>

</body>
</html>
So here we completed post on Use Server Side Datatable Laravel 5.8.
Good Luck!

Brijpal Sharma is a web developer with a passion for writing tech tutorials. Learn JavaScript and other web development technology.